- SwiftLint와 SwiftFormat은 둘 다 Swift 코드 스타일을 좋게 유지하기 위해 도와주는 툴입니다.
- 다만, SwiftLint는 linting에 SwiftFormat은 formatting에 조금 더 초점을 맞췄습니다.
- Linting은 코드 스타일의 정해진 규칙을 어길시 warning 혹은 error를 띄워줍니다.
- Formatting은 warning과 error 대신 코드를 수정합니다.
Homebrew로 설치
- SwiftLint와 SwiftFormat 둘 다, 사용하기 위해서는 맥에 설치를 해야합니다.
- 둘 다 Homebrew를 지원하므로 다음 명령어를 터미널에서 실행해 설치합니다.
brew install swiftlint
brew install swiftformat
- 다음 명령어를 통해 잘 설치 되었는지 확인하고 넘어갑니다.
brew list
SwiftLint 설정
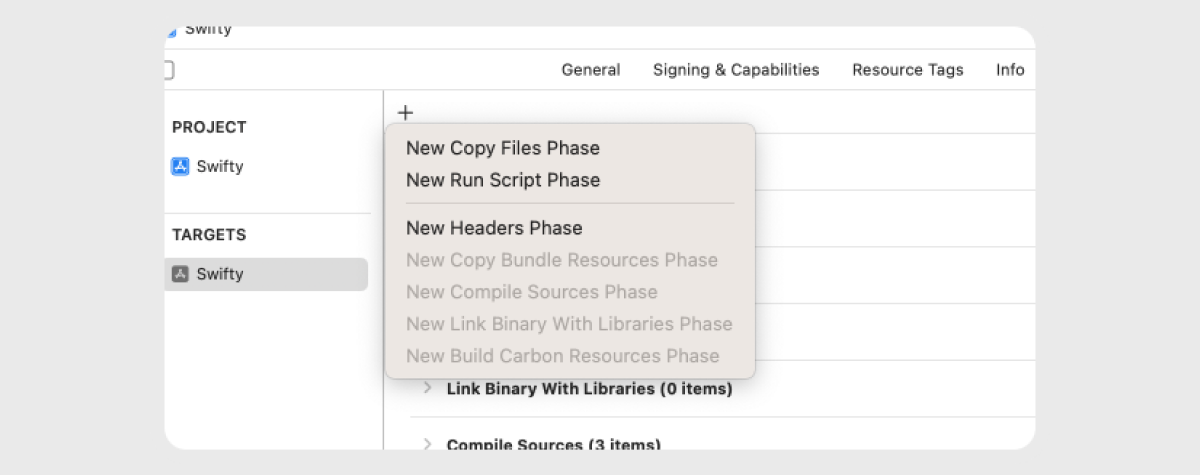
- 이제 Xcode에서 설정을 진행해야 합니다.
- Target 프로젝트의 Build Phase로 이동하여 New Run Script Phase를 눌러 추가합니다.
- 추가된 Script 이름을
SwiftLint로 변경해주고 다른 설정은 그대로 나두고 script를 작성해줍니다.
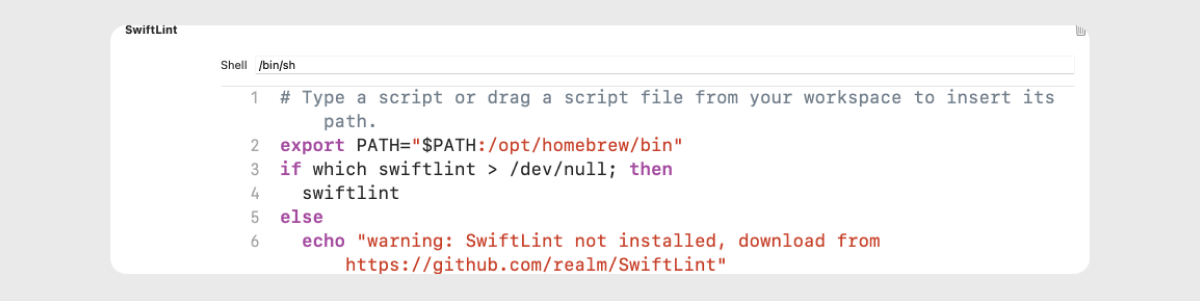
- 다음과 같이 작성해주면 되는데, 해당
PATH는 Apple Silicon 맥 기준입니다.
export PATH="$PATH:/opt/homebrew/bin"
if which swiftlint > /dev/null; then
swiftlint
else
echo "warning: SwiftLint not installed, download from https://github.com/realm/SwiftLint"
fi

- SwiftLint를 설정했듯이 New Run Script Phase를 추가해 script를 작성합니다.
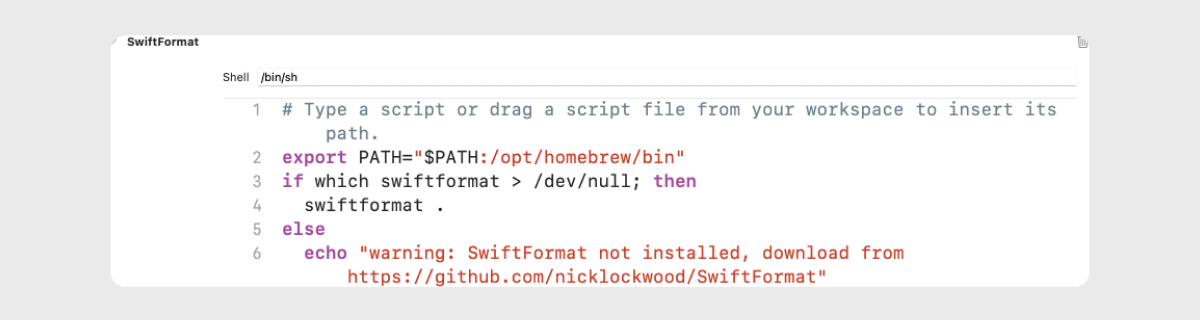
- 다음과 같이 script를 작성하면 되고, 이 역시 Apple Silicon 맥 기준입니다.
export PATH="$PATH:/opt/homebrew/bin"
if which swiftformat > /dev/null; then
swiftformat .
else
echo "warning: SwiftFormat not installed, download from https://github.com/nicklockwood/SwiftFormat"
fi
Build 하기
- Build Phase를 최종적으로 다음과 같이 정렬합니다.

- 그리고 빌드해보면 formatting과 linting이 컴파일 전에 진행됩니다.